
In our kitchen, we keep our dish and hand towels draped over the handle of the oven. I could exaggerate and say they fall off all the time, throw my hands up and shout to the heavens, “there’s got to be a better way?!”

But it’s a mild annoyance that the towels slip off the handle and fall or need to be moved so I can safely open the oven door. Most of the time, the towels just end up in a wad on the counter because I’ve realized the futility of it all. As dramatic as it sounds, it was not a thought that consumed my every waking moment but had lodged itself into the back of mind so that I just happened to notice a solution my genius grandmother uses in her kitchen. She has a towel with little strings sewn on, which she uses to tie a neat little bow and fix the towel’s position to the oven’s handle.
This seemed easy enough to make and a great idea for a personalized housewarming present. I made a few, substituting a button for the strings (to add a little bling) and I’ve landed on a go-to pattern / process for making these, which is shared below.
Supplies: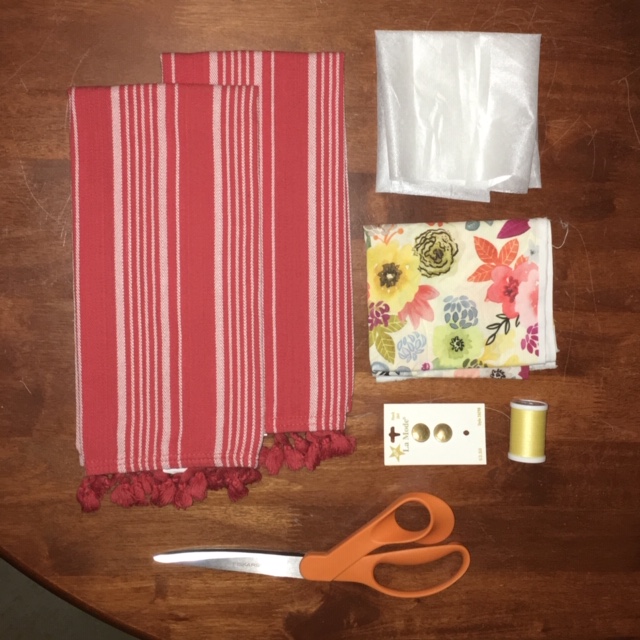
- 1 Fat-Quarter of patterned fabric. Think quilter’s cotton or broadcloth, with a small or medium-sized design. A fat-quarter will be enough for 3 hanging towels, but I usually only make a pair and save the excess for making a potholder or trivet. ** Be sure to wash and dry your fabrics before you sew, so they will not bleed or shrink later and ruin the project.
- 1 Dish Towel (1 towel will be enough for 2 hanging towels). I recommend solid colors, the flat 100% cotton style or flour-sack type. The project can be done with terrycloth but these are thicker and more difficult to sew (so not ideal for the first attempt).
- Light-Medium weight, One-sided, Fusible Interfacing. If you’re buying it for this project you’ll only need 1/8th of a yard; though scraps from other projects usually work well. I want to note that to be more exact consider the fun sewing-math fact that this will measure differently than your Fat Quarter because these are shaped differently. A quarter of a Yard is actually the full length of the bolt (usually 36″ or 44″) x 9″ while a Fat Quarter is 18″x22″.
- 2 Medium or Large Buttons that pair well with your patterned fabric.
- Thread. I usually go for two colors, the first will blend with the base / background or most-prevalent color in your patterned fabric so that you can hide the stitches easier. The second color is usually a contrast, something to make the button hole stand out, compliment the button color, or accent a smaller detail in the patterned fabric.
- A bowl.
- Standard sewing supplies: Sewing machine (with standard foot and a button foot), Scissors, Seam-Ripper, Needle for hand-stitching, Iron, Pins, and a Pencil
Instructions – After you’ve gathered all the supplies, washed and dried your fabric, and turned on your iron:
- Iron your fabric – seriously, this is an important first step. Steam it if you have to and get the wrinkles out.
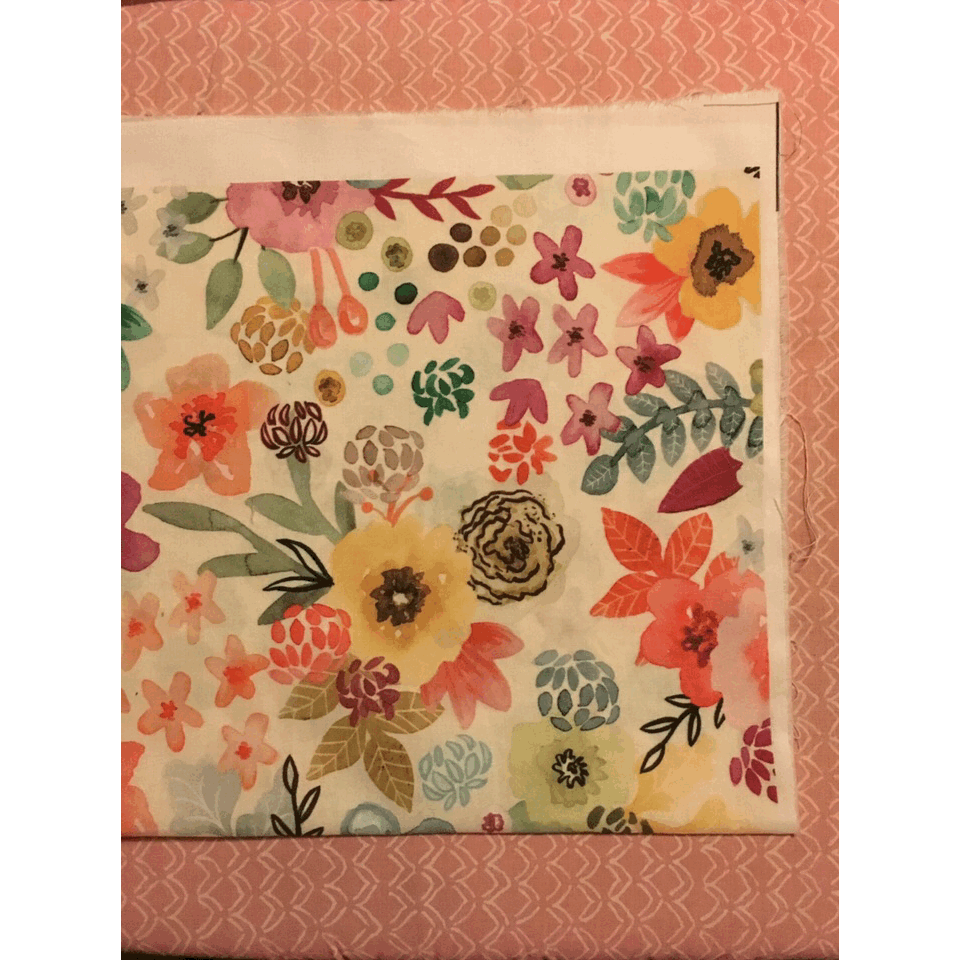
… - Fold your fabric lengthwise / hot-dog style so that you have a 9″x22″ rectangle and lay it out on a flat surface (I use the ironing board). If you’re using a custom design fabric from somewhere like Spoonflower, like I have pictured, make sure the pattern coverage areas match up on either side of the fabric.
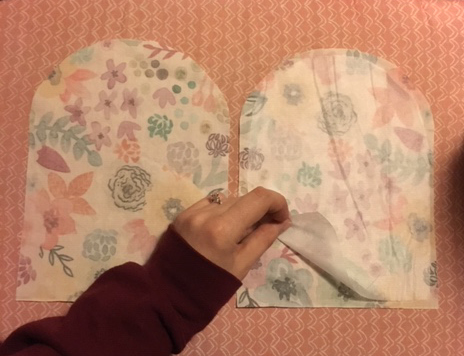
… - To get the pattern, you will fold your towel into thirds and place your towel about 3/4″ away from the edge, this is the seam allowance. Note, the fold is not important in this pattern. Then place your bowl on top of the towel – you are going to use the crescent shape as a guide so it is good to line up the edge of the bowl with the edge of the towel. Use the pencil to trace around both shapes, leaving a ~3/4″ gap all the way around, and then remove the bowl and towel.
… - Pin the two layers together and then cut out the shape, and if your towel covered the fold be sure to cut this part open.
…

- Use this shape as a pattern and cut a single layer of interfacing (I usually subtract the 3/4″ edge on the interfacing because it makes flipping the seams easier later, but this is just a personal preference).
… - Fuse the interfacing to the back / non-patterned side of one of the fabric.
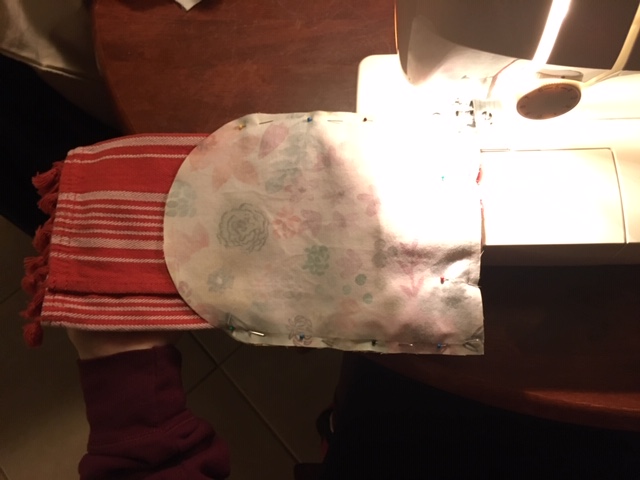
… - Cut the towel in half. Essentially, this allows for it to hang down at the same length as if it were folded over that oven handle, without actually being folded. If you use the full length of the towel your hanging-towel will probably brush the floor.
…
- Place one of the patterned layers, pattern side up on your flat surface. Then lay the freshly-cut half towel so that the cut side aligns with the straight edge of the patterned shape. Then sandwich it all together by placing the interfaced, patterned piece, pattern side down. Align the straight edges and pin them together.
… - Stitch the seam that will hold the towel material to the patterned fabric. I usually run this one through twice for extra durability.
… - Once your pattered fabric is securely attached to the towel, remove the pins and add your button (it will be secured on the inside). I like to place it so that the flat side is displayed (I consider this the front) vs. the side of the towel where the folded pieces open (the back). But it depends entirely on what look you prefer. Note: adding the button at this stage will hide the securing stitches used to attach it.
… - Pin the right-facing, patterned pieces together pulling the bulk of the towel to one side. Stitch all the way up until the part where the towel is pulled out. I usually add a few reinforcing stitches around the last pin so they aren’t pulled out when the shape is inverted.
… - Trim and clip your seams (this is especially important for the rounded parts). Then invert the shape by pulling on the towel fabric. Be sure to press out the seams using a chopstick or some other tool and then iron the patterned fabric.
… - Fold-in and press the patterned fabric that remains open and then hand-stitch (using a Slip or Invisible style stitch) this section so that it aligns with the rest of the shape.
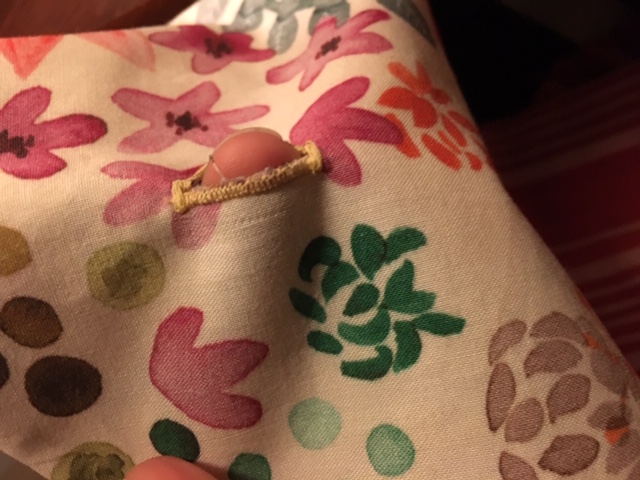
…  Fold the shape over and measure to where you want your button. Measure the diameter of your button and mark this directly onto the fabric. Very carefully, use the seam ripper to cut a straight line through the fabric to create the button hole.
…- Replace your thread with the contrasting color, if you’re using it, and swap out to the the Button Foot on your sewing machine. Follow your machine’s instruction’s for sewing a button hole and then test it. DONE!
Repeat, if you’re making a second towel and then hang it up and admire it or give it to your amazing friends!