Our spare bedroom / office wasn’t really functioning well as either of those things. The futon we had was falling apart and often left our guests with sore backs. My original thought was to build a frame and get any one of the numerous online mattresses-by-mail. After about a dozen sketches or the room, taking measurements several times, and a handful of model builds in SketchUp of modular bookcase bed frames that could be rearranged into bookshelves if desired, my husband convinced me that the cost benefit of making these myself wasn’t worthwhile.
I turned to commercially available frames with the following criteria: suitable for a queen sized mattress, allowed for ample storage, and an attractive pine (or similar) finish to match the room. The bed-frame bracket was contentious but we eventually landed on the Charleston Platform Plus, an unfinished Tulip Poplar frame by KD Frames, sold through Amazon and similar to a listing found on Wayfair, this frame has a high clearance that allows for a Twin XL trundle bed and a set of drawers. It also appealed to my initial desire to build and customize the frame by being solid, unfinished, wood; meaning it could be stained, sealed, or painted. The following post documents the frame finishing and build project:
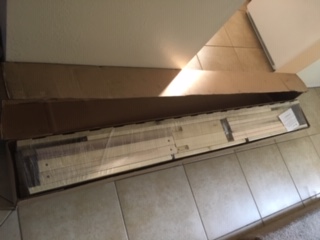 Step 1: Received delivery and opened the box! The Charleston bed shipped in a massive (over 75lbs) box which I definitely recommend 2 people carry. Luckily, after the UPS guy dropped the box on my porch I was able to pivot and simply lower it through the front door and onto the floor of the entry way. It’s actually pretty impressive the way all of the pieces are nicely Tetris’ed together.
 Step 2: Verified I had the right thing, read the instructions, and counted the hardware components. The instructions and all of the hardware came in this durable ‘Ziploc’ style bag which was also wrapped in a protective layer of shrink wrap. I opened this first, counted and sorted the hardware which was very easy to identify. I also read through the instructions – they’re incredibly easy to follow and KD also provides a tutorial video URL and recommendations for finishing the wood.
 Step 3: Decided on a finish and assembled the supplies. As I mentioned I read the instructions that came with the frame, but I also ended up doing about 4-6 hours of research (reading woodworking websites and watching loads of how-to Youtube videos, Steve Ramsey’s was particularly helpful) to determine the best approach. I decided I didn’t want to stain the wood to make it look like a different kind of wood; I read that Tulip Poplar wood is excellent for painting and generally stains well. However, I like the natural, light color and just wanted it a little more warm with a bit of protection from wear and tear. I decided on an oil-based, Wipe-On Poly because it applies well to large projects, is relatively easy for beginners, cures pretty fast, and would impart a slight warmth to the color of the wood.
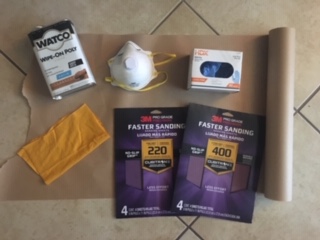
Supplies pictured: Watco Wipe-On Poly, N-95 Respirator, Nitrile Gloves, ‘Cloths’ (1 old t-shirt, cut up works great) you’ll need at least 1 cloth piece for each coat ~7-10, 220 and 400 grit sandpaper, painter’s paper (not necessary if you have a dedicated space, but I wanted to protect my patio from drips).
A few notes about the supplies: not pictured here are the foam brushes I purchased – most of the tutorials mentioned using a good quality brush but one video showed using a foam brush applicator to apply a thin coat of the polyurethane and then rub it in with a cloth. While this is the method I used, it could easily be done without. For the nitrile gloves, if you’re very careful you can reuse these a couple of times. I had to change mine about every other coat so I definitely recommend getting the larger pack (they’re pretty handy for all kinds of household projects so I always keep them in stock). For the cloth, just cut up an old t-shirt. A blog I read suggested cutting down the sides and center of the front and back of the shirt to make 12 small cloths and this was perfect – just be sure to remove any bulky areas like the neck and other seams.
Not-So-Pro-Tip: do not use a dark colored shirt to wipe the poly onto light wood; on my first pass I used a navy blue t-shirt scrap and it left blue lint in my poly coat.
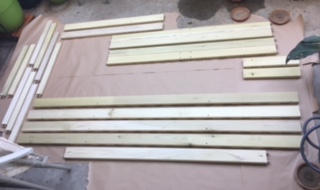 Step 4: Sand if needed, find the space, and devise a strategy. I did a little bit of sanding with the 220 Grit Sandpaper before beginning because the ends were a little rough but over-all the boards were ready right out of the box. I did wipe them down, which I recommend doing between each coat as well (the Poly picks up, and will seal onto the wood, any bits of lint or hair, or rocks, or leaves). In fact, I wanted to start when this picture was taken but the wind picked up and immediately tossed dust all over the boards so I had to hold off until the weather improved.
I also mention coming up with a strategy – I probably could have finished this over the long, Veteran’s Day weekend but I started a bit late and then encountered inclement weather. The Poly can be re-coated every 4 hours and cures enough to build after 24. You will want at least 3 coats on all of the surfaces so you can essentially plan out your day in 4-hour blocks.
 Step 5: Do the thing? So, here is actually coating the boards – the first few layers I did were pretty thick (probably don’t need to do it quite this thick, but the shiny bits help show the coverage). I brushed on the Poly and then wiped it with the cloth to spread the fluid, the wood sort of soaks it up. Let this dry, dust the boards off, and re-coat. After the first two coats you’ll want to take the 400 Grit Sandpaper and smooth the boards.
Not-So-Pro-Tip: Sand before the 3rd coat, I did not think this would make a huge difference but it definitely does. The boards feel silky soft when finished.
Not-So-Pro-Tip: I have read horror stories about wadded up cloths spontaneously combusting – this happens because of products like the Wipe-On Poly. While the instructions on the container mentioned using a metal container with a bit of water (which I didn’t have) I found a tutorial illustrating a method to dry and dispose of the cloths by laying them out, completely flat on cement with rocks on corners to weigh them down. You don’t want any of the fabric folded over on itself. I left mine out for 24 hours (or more in some cases) and when they were completely dry tossed them into the dumpster. Aside from that, I followed all of the directions and safety precautions (ie: DO NOT wash the rags in the sink).
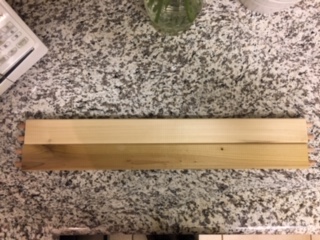
Here is a photo just to illustrate the color difference from the unfinished boards to a board with Poly applied. I will note that some of the boards had hints of green, from everything I read this is completely normal for Poplar and will turn brown over time.
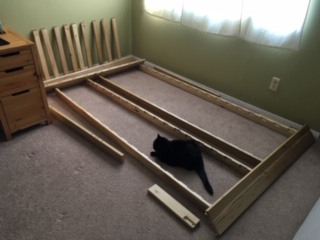 Step 5: Let everything cure and maybe air out so it doesn’t reek of the Wipe-on Poly before you bring it in the house. These boards actually ended up sitting outside for about a week since I only had time to work on the frame over the weekend. I picked the pieces that looked nice and laid them out so we could assemble this – Rover helped.
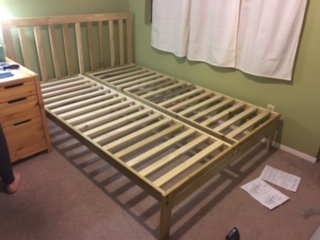 Step 6: Later in the day Gunnar helped me assemble the frame using a hex wrench (which was provided in the hardware kit) and a power drill. Most of the slats are just sitting in the frame, not attached, but it still feels incredibly solid.
 Step 7: Add a mattress and clean sheets – the room is now Thanksgiving visitor friendly! I should note that our mattress is a 12″ with a 5″ pillow-top so it is sitting much higher on this frame than most normal mattresses would.
I’m pretty happy with how it all turned out and will definitely be looking at the trundle and drawer options, just maybe not right away. The finishing process is easy once you get going, but it does take a bit more time management and planning than anticipated.